I cannot believe how fast time gets away from me! We have had a really busy spring and summer is bursting out on us already. So, here are some updates.
The Living Room Floor
I am sure that some of you are wondering how the living room floor is holding up from our non-traditional refinishing approach. Surprisingly, it still looks really good. I have cleaned it one time with a solution I mixed consisting of vinegar, olive oil, and water. It refreshed it beautifully. At some point, we do plan on sealing it with something more conventional, but for now, we are continuing as is and hoping to get to the dining room next.
Back to Eden Garden - Year Two
A lot of you like to know how the Back to Eden garden approach works. Well, we are floored by the goodness of God! We actually planted our garden super early (for Wisconsin) this year. We had everything in the ground by the third week of April. Yes, we know it was still cold. But, believe it or not, our garden soil was not frozen! The heavy mulch that we put down last fall really helped. We had more weeds this year initially but I think this was due to two factors: (1) we had a much wetter spring than last year and (2) I was not able to get a truckload of wood chips until the last week of June. We had tried to get some using the same resources from last year, but it was not working out. But then one day, I noticed a company cutting down some of our neighbors' trees. So I asked for the wood chips. At first, they said "no" because they thought I would not want the leaves and everything. I finally convinced them that I knew what I would be getting and so we got a whole truckload! They were really happy to give it to us since it saved them a trip back to their home shop - about an hour away one way!
It is because of the garden that I have not been able to blog like I wanted to. We have already eaten all the radishes and lettuces. We are almost to the end of the sweet peas and are getting buried in zucchini and green beans. Plus with the local strawberries coming in and now the blueberries, I have been super busy canning, processing and baking.
We did do a few things different this year. Over the winter I read a few books on companion gardening and so we tried this approach. Since this is only our second year of gardening, we feel this year has already been a success, and we definitely learned from our mistakes last year. But the learning curve continues.
We learned last year to cage our tomatoes. This year, we learned that tomatoes will grow where you never even planted them - like in the middle of your corn.
This year I planted beets, and learned that beets look a lot like dandelions and other weeds when they first sprout. Yep, you guessed it - I pulled all my beets! And replanted them.
I learned that peas love carrots and parsnips. All three are growing like crazy! I also learned that corn, beans, and vine plants love one another. Unfortunately, picking beans that are growing around corn stalks, covered with vine plants like squash means it is really hard to get the beans! Those vine plants are itchy! But I have had a much better crop of beans this year compared to last year!
Last year and this year I planned out the garden using Excel. Last year it worked great. This year, not so much. The plan was awesome, but because we did not plant in traditional rows for a large portion of the garden due to the interspersing of herbs and flowers, I have no idea of what is growing and where. It was really confusing. I can't tell you how many times my husband asked me what something was and I had to admit I had no clue because I had never planted much less seen half of the stuff before!
Last year we learned that onions take a really long time to get big like the ones in the store. This year I planted from seed so that NEXT year, I will have wonderful onions. Please God? I only planted like six or seven varieties.....and I really want some good onions!
The House
We have not done a whole lot to the house. My wonderful husband made some new window screens so we could open the windows in our bedroom and the ones at the end of the hall. This helped tremendously in cooling down the house in the early days of summer.
Once it got really hot, we rigged up our own central air. We sealed up all the vents in the basement so that a minimal amount of air leaked out of them. We then installed a window air conditioner in the room with the cold air return for the furnace. Turn on the furnace fan and it sucks the cold air from the air return (cold from the air conditioner and it settling to the floor) and redistributes the air conditioned air throughout the house. Once the vents were blowing cold air, we strategically placed fans in front of each vent upstairs to disperse the air into each room. Voila! Central air. It actually made the second floor of our house livable. Or should I say sleepable?
My husband also surprised me with two apple trees, a blueberry bush and a raspberry bush. We agreed that I could have a small orchard in the front and side of our house, to the clothesline. From the clothesline to the shed and vegetable garden, I am not allowed to plant anything. I think my husband is afraid he won't have anyplace to throw a ball with the kids.
I tried something new this year. Every year that we have been here, I have tried to plant strawberries from seeds. Seeds sold in packets. And nothing has ever grown. So, I took a whole bunch of strawberries that I picked myself from the pick-your-own farm and planted them. Yes, I did. I planted a row of fresh, ripe strawberries. I figured that if they would grow and spread plants at the farm then why not at my house. I am not the only person that thinks this makes perfectly logical sense? Right? So, hopefully next year I will have a beautiful batch of strawberries. Or at a minimum, plants. I mulched them really good with wood chips, and I have been watering them almost daily. I figured with about 100 seeds per strawberry, the odds have to be in my favor.
And we fixed the toilet. Apparently, one of the three stooges, oops, I mean one of the three younger children decided to flush Hamm, the hot wheels version of Hamm, the pig from Toy Story, down the toilet. And Hamm, being made of metal and being slightly taller than the average Hot Wheels, went only so far and then got stuck. We could flush, but had to pray and plunge and eventually the water would disappear down the drain. We tried using a special tool to push Hamm through the toilet to the main pipe, but alas, it did not work. My poor husband had to remove the toilet and push Hamm back out the way it originally went in. I have to admit that Hamm really did look like a pig that had rolled in the "mud". It was down right nasty. But I did learn that installing a toilet is much easier than I first imagined.
That's all for now....I hear some zucchini calling my name.
Showing posts with label Flooring. Show all posts
Showing posts with label Flooring. Show all posts
Thursday, July 18, 2013
Saturday, April 20, 2013
A Discovery That Saved Us $7,000
One of the earlier discoveries that we had made about our house was that all of the original flooring was 2.5" maple, on both the first and the second floors. We were thrilled, but discouraged at the same time. It appeared to us that all of the floors were in various conditions and that we would need to refinish them all. We even got a couple of quotes to have it done professionally.
There were a few issues with this option, the greatest of course being the price. We were quoted $3,500 per level which meant $7,000 for all the floors in the house. Ouch! Secondly, we would be required to vacate the premises and ensure that all furniture was removed from each level of the house since it would be done in two stages. With a houseful of kids, not to mention the 550 pound upright grand piano, this promised to be a real headache. Especially when one keeps in mind that we are more than 2 hours away from any extended family. Thirdly, we were told that because our floors were maple, once sanded and finished, they would be more blonde in color and not the deep red-brown of the original floors. Bummer....And finally, we would be exposed to all sorts of wonderful noxious chemicals. Great....just great.
We decided to just live with the floors for the time being. It wasn't a tough decision - after all, the kitchen floor at the time was still covered with adhesive and so were two of the upstairs bedrooms. In the meantime, we talked with the local Amish woodworker that has been building our furniture and he said that he would help us try to find out a way to stain the wood the color we wanted. In other words, we could have really good experienced help if we decided to finish the floors ourselves. Still, a daunting task.
But then a little accident saved the project and us $7,000. I had heard about a homemade cleansing paste that could be made by mixing hydrogen peroxide with baking soda. I was in the process of scrubbing out a Coleman cooler with this paste to remove the funky smell it had gotten from being in the garage all winter. In the process, I splattered some of this paste mixture onto the kitchen floor. I finished cleaning up the cooler and set it upstairs in the tub to dry. I then had to clean up the mess on the kitchen floor.
You can imagine my surprise when the paste picture seemed to sand the floor down and remove all the grease, stains and paint. Hmmm. I kept wiping it down with water because the floor seemed a bit gritty. In other words, I could still feel the baking soda. I decided to use some of my homemade orange cleaner, which is mostly vinegar, and wiped it down again. Now the baking soda residue was gone, but the wood looked dry....really dry. That got me thinking. I had heard that back when our house was built, a lot of times oil was used to finish wood. So out came the olive oil. And wow! What a difference. My husband and I literally sat and looked at the small finished section of the floor, to see what would happen, over a period of three days. And nothing happened. I don't know what were expecting, but the floor continued to look awesome.
Those of you that actually read our blog can probably guess what we did next....Yup. We did. We refinished the entire living room floor as our test project. Once again, the results are awesome....especially since we got the color that we wanted! Of course, seeing is believing, so here are some photos for you.

Here is what the floor looked like when we started. Kind of a dingy gray looking wood with a lot of paint spots. I mean, the people that painted in this house never seemed to clean up their paint messes or even protect the wood to begin with. Anyway, I think we can all agree that sure isn't pretty.

I know that in this picture it is kind of hard to see, but in the upper right hand corner, the floor looks a little bit duller than the rest; and a bit whiter. Scrubbing the floor with the paste made from hydrogen peroxide and baking soda really did a great job of cleaning up the wood. The "gray" appearance turned out to be mostly dirt. I don't even want to think about how many years worth I was scrubbing away. It also removed the majority of the paint. You can kind of see where I stopped because you can see all the paint spots!
After scrubbing the floor with a paste, it looked like the floor, of course, but with a white powdery finish with swirly marks. As a scrubber, I used a Scotch Brite Dobie Sponge. It really did the trick and held up pretty much until the end. Of course, the last few boards were a bit challenging because the sponge finally gave up and fell apart. The next step was to wash down the area scrubbed thoroughly. Again and again with really hot water. The goal was to get all of the baking soda and peroxide residue off the floor. And then the fun really begins. You get to sit and watch the floor dry.
Exciting.
I know. It's almost as fun as watching paint dry.

In this picture, the floor is all scrubbed clean and I am waiting for the floor to dry. That is why the clean part looks a little bit shinier than the section below it which I have not started. Once the floor is dry, I thoroughly sprayed it with my homemade orange cleaner. Spray, spray, spray...and then wipe, wipe, wipe. The vinegar in this cleaner does an awesome job of removing any residue from the baking soda and gives you a really clean, kind of dried out floor. Of course, once you are done wiping it down with the orange cleaner, you get to....
You guessed it.
Sit and watch the floor dry. Again.
Once the floor is dry again, then you can start pouring on the oil. We used an extra virgin olive oil packaged in Italy. It costs about $6 per bottle and I used three bottles on our living room floor. Our living room roughly measures 12 feet by 14 feet, just to give you an idea. To spread the oil, I used a swiffer type mop with a washable attachable cloth. I simply poured the oil on the floor and then spread it around.
The number of "coats" of oil that you want to use is up to you. The more you add, the darker it gets. We have put down two heavy coats to achieve the look and color that we wanted.

We are not quite done with the floor in this picture. I still have to move the couch and end table, but it did provide an excellent "before" and "after" comparison. What a difference!
To clean the floor, we will be using a mix of vinegar and olive oil until we can seal the floor. I am still researching the best option on how to do that, but will be sure to share once we decide on something.
Now just to wait for my arms, legs, and back to recover to move onto the next room.
Friday, November 16, 2012
I Love My Heat Gun...I Love My Heat Gun...
I love my heat gun.....if I keep repeating this to myself, maybe it will come true! Actually, I really do appreciate my heat gun. My hands and arms are just starting to get really sore. My wonderful husband has been very busy this week and some of the work necessitated him being out of town for a few days. Since there are not very many projects that I can do without his capable hands, I decided that I would tackle stripping the carpet adhesive from the floor in the master bedroom.
Oi vey.....what was I thinking?
The heat gun that I am using is a Wagner and overall, I have been really happy with it. Thus far, it has stripped the kitchen, most of the back entryway, the stairwell trim, and now a good portion of the floor in the master bedroom. Unfortunately, this wonderful piece of equipment gets heavy after repeated hours of continuous use. It is all I can do to type right now....my hands and wrists are so sore. I am so thankful that this adhesive is nothing like the black stuff on the kitchen floor. And that it is nap time for the littlest Fuller! Yeah! Break time!
The good news is that when the heat is applied to the carpet adhesive, it turns to the consistency of hot caramel and just has to be scraped off. This means I can clear a fairly good sized section in about an hour. The bad news is that the master bedroom is the length of the entire house and really wide. Thus far I have finished an approximate six foot square. I am about half-way across the room in either direction.
I was hoping to get the entire floor done by the end of the day today, but now, I don't see that happening. Maybe I will be able to get it finished by the end of tomorrow. I really want it done prior to next week since we are having some family over to celebrate Thanksgiving. With so much of our house deconstructed, it would be nice to show that we have made progress...somewhere....anywhere.
Friday, November 9, 2012
The Mystery House
This house has been a mystery for us ever since we bought it. We knew it was built in the 1920s but finding a set of floor plans has been very frustrating. In some ways, the house is similar to a bungalow, yet it has a gambrel roof and two shed dormers. Regardless, some of the mystery has been solved with the removal of the drywall ceiling.

Case in point, the kitchen. This is what the kitchen looked like when you stand with the bay windows to your back. Not bad, if you like laminate flooring, cheap counter tops, and care absolutely nothing for the historical integrity of the house. Trust me, it looks much better in the picture than it did when we actually moved in.
Yesterday, my husband removed the funny counter top from the half wall and continued removing the drywall ceiling. In the process, we discovered some new mysteries and solved a few old ones.
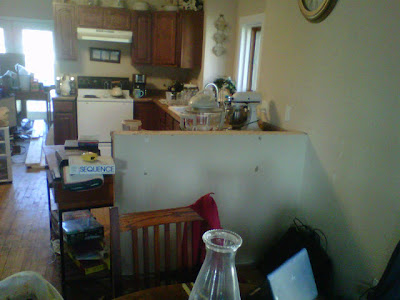
And now you can see it without the counter top. This should also show why that half wall should really be a full floor to ceiling wall. Anyone walking into my house gets to see the messiest parts of the kitchen! The sink and stove are directly in the line of sight from the front door. Not good, at least for an OCD person like me. It drives me crazy and I can't wait until the wall is put back....but more on that later.

One of the new mysteries is why was this floor chopped up and then fixed with cheap wood? If you look really closely, you can see the cuts made into the maple floor by a circular saw. But why? By reviewing the ceiling in the basement and looking closely at the floor, we have determined that a heat vent was in this wall at one time and was used to heat the dining room.
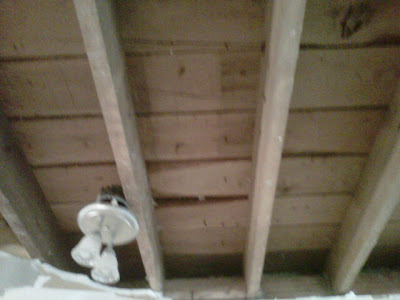
By examining the ceiling above the half wall, we were able to see evidence that there was in fact a wall that went all the way up to the ceiling. And you can also see that the wood blocking in the ceiling perfectly lines up with the missing floorboard under the half wall. One of these days, that wall will be put back.
As for other mysteries, we are still fighting bats. Yet another one got into the house last night and was quickly dispatched by my knight in shining armor. A second and third bat were heard later in the evening, but we could not find where they were hiding. We are praying that we were hearing them leave the house! Unfortunately, my husband heard yet another one in the walls early this morning. Maybe I should change the name of this blog to The Bat House!
Some time ago, we had another little unsolved question. We had mysterious pools of water on the bathroom floor in the lower half bath. Not enough to splash, but enough to be absorbed by the dropped toilet paper rolls and paper - evidence that one of the kids used the last of the roll. We could not figure out where the water was coming from and suspected that our youngest son was maybe "missing the target"! The bathroom constantly had an outhouse odor to it too, no matter how often I cleaned the floor. It was all very frustrating.
And how do we solve mysteries in this house? With small scale demolition of course.

Do you see what I see? There is a slightly old, but drier water stain that runs the perimeter of the bathroom. We suspect based on evidence of water in the basement and in this bathroom that there may be a leak in one of the pipes in the full bath upstairs. This bathroom is of course located directly above the lower half bath. You can also see that we have a major water issue with the current toilet.

In this case, we are suspecting that the wax ring has failed for some reason. There is no logical reason for its failure - this house was allegedly completely remodeled a year before we bought it. The people that flipped the house either did not know what they were doing or were attempting to cover myriad issues. Needless to say, my husband is not real happy at this point.
On to more pleasant things. As part of our home restoration process, we spend a fair amount of time checking out various sites for replacement components. Specifically, Ebay and Craigslist. Today, my husband found the perfect set of wall cabinets for sale. Unfortunately, the price is not so perfect for us right now. But I can still hope and pray! As a back up plan, I saved all the pictures so that we could, as a last resort, have our wonderful Amish woodworker reproduce them.


Here again are some photos of the kitchen when we first moved into the house. While these cabinets look nice, they are the cheapest money can buy and still have the alphabetical assemble-yourself stickers on them! No wonder they are already falling apart. Anyway, this space is very long and fairly tall. My husband found an original set of 1920 kitchen cabinets for sale.


Aren't they absolutely gorgeous! What was even more amazing was how the measurements exactly fit the space we have available. Now, if we can just swing the financial end of it before some else! I really like to the two bins and the five drawers. As for the space between the two sets of upper cabinets, I would fill that with some matching open shelves for storing my prettier dishes and apothecary supplies.
We also found a lead on a collection of 1920 farmhouse doors for sale. There are between 15 and 18 of them available, and some of them even have the original hardware. For some reason, when the house was flipped, they yanked out all the original doors except for the three closets in the bedrooms and the pantry door that we rehung a few weeks ago. It would be a true blessing if we could source all the doors from the same place and start replacing the nasty modern ones. Here are some pictures of the doors that I am drooling over now....


Now, lest you think that all we do is destroy our house, I thought that I would end today's post with some of our accomplishments. I don't know how many of you remember this?

This is a picture of our kitchen floor, after we removed the laminate flooring. I am proud to share that we have finally finished removing the black adhesive. Now, our kitchen floors look like this....


Of course, it still needs to be sanded, stained, sealed and finished properly. But, in the meantime, we are really excited and pleased with how good the floors came out. We still have to finish the side entrance and then two of the bedrooms upstairs. Overall though, it is looking good!

Case in point, the kitchen. This is what the kitchen looked like when you stand with the bay windows to your back. Not bad, if you like laminate flooring, cheap counter tops, and care absolutely nothing for the historical integrity of the house. Trust me, it looks much better in the picture than it did when we actually moved in.
Yesterday, my husband removed the funny counter top from the half wall and continued removing the drywall ceiling. In the process, we discovered some new mysteries and solved a few old ones.

And now you can see it without the counter top. This should also show why that half wall should really be a full floor to ceiling wall. Anyone walking into my house gets to see the messiest parts of the kitchen! The sink and stove are directly in the line of sight from the front door. Not good, at least for an OCD person like me. It drives me crazy and I can't wait until the wall is put back....but more on that later.

One of the new mysteries is why was this floor chopped up and then fixed with cheap wood? If you look really closely, you can see the cuts made into the maple floor by a circular saw. But why? By reviewing the ceiling in the basement and looking closely at the floor, we have determined that a heat vent was in this wall at one time and was used to heat the dining room.

By examining the ceiling above the half wall, we were able to see evidence that there was in fact a wall that went all the way up to the ceiling. And you can also see that the wood blocking in the ceiling perfectly lines up with the missing floorboard under the half wall. One of these days, that wall will be put back.
As for other mysteries, we are still fighting bats. Yet another one got into the house last night and was quickly dispatched by my knight in shining armor. A second and third bat were heard later in the evening, but we could not find where they were hiding. We are praying that we were hearing them leave the house! Unfortunately, my husband heard yet another one in the walls early this morning. Maybe I should change the name of this blog to The Bat House!
Some time ago, we had another little unsolved question. We had mysterious pools of water on the bathroom floor in the lower half bath. Not enough to splash, but enough to be absorbed by the dropped toilet paper rolls and paper - evidence that one of the kids used the last of the roll. We could not figure out where the water was coming from and suspected that our youngest son was maybe "missing the target"! The bathroom constantly had an outhouse odor to it too, no matter how often I cleaned the floor. It was all very frustrating.
And how do we solve mysteries in this house? With small scale demolition of course.

Do you see what I see? There is a slightly old, but drier water stain that runs the perimeter of the bathroom. We suspect based on evidence of water in the basement and in this bathroom that there may be a leak in one of the pipes in the full bath upstairs. This bathroom is of course located directly above the lower half bath. You can also see that we have a major water issue with the current toilet.

In this case, we are suspecting that the wax ring has failed for some reason. There is no logical reason for its failure - this house was allegedly completely remodeled a year before we bought it. The people that flipped the house either did not know what they were doing or were attempting to cover myriad issues. Needless to say, my husband is not real happy at this point.
On to more pleasant things. As part of our home restoration process, we spend a fair amount of time checking out various sites for replacement components. Specifically, Ebay and Craigslist. Today, my husband found the perfect set of wall cabinets for sale. Unfortunately, the price is not so perfect for us right now. But I can still hope and pray! As a back up plan, I saved all the pictures so that we could, as a last resort, have our wonderful Amish woodworker reproduce them.

Here again are some photos of the kitchen when we first moved into the house. While these cabinets look nice, they are the cheapest money can buy and still have the alphabetical assemble-yourself stickers on them! No wonder they are already falling apart. Anyway, this space is very long and fairly tall. My husband found an original set of 1920 kitchen cabinets for sale.


Aren't they absolutely gorgeous! What was even more amazing was how the measurements exactly fit the space we have available. Now, if we can just swing the financial end of it before some else! I really like to the two bins and the five drawers. As for the space between the two sets of upper cabinets, I would fill that with some matching open shelves for storing my prettier dishes and apothecary supplies.
We also found a lead on a collection of 1920 farmhouse doors for sale. There are between 15 and 18 of them available, and some of them even have the original hardware. For some reason, when the house was flipped, they yanked out all the original doors except for the three closets in the bedrooms and the pantry door that we rehung a few weeks ago. It would be a true blessing if we could source all the doors from the same place and start replacing the nasty modern ones. Here are some pictures of the doors that I am drooling over now....


Now, lest you think that all we do is destroy our house, I thought that I would end today's post with some of our accomplishments. I don't know how many of you remember this?

This is a picture of our kitchen floor, after we removed the laminate flooring. I am proud to share that we have finally finished removing the black adhesive. Now, our kitchen floors look like this....


Of course, it still needs to be sanded, stained, sealed and finished properly. But, in the meantime, we are really excited and pleased with how good the floors came out. We still have to finish the side entrance and then two of the bedrooms upstairs. Overall though, it is looking good!
Friday, October 12, 2012
Canning Season Is Over
Canning season has come to an end for 2012 with the processing of the pumpkins. While in the midst of it all, it seemed like I was canning every day. Now that we are done, I was surprised at how little I was able to get done out of our garden. I am thankful for the Back to Eden approach and am looking forward to doing it again next year, but I was really surprised by the total overall. I had such high expectations for our first gardening experience! I am trying to keep in mind that this year we were suffering from a horrible drought and some of our plants just didn't seem to produce, such as the Brussels sprouts.
I have updated the food preservation page to include the totals of everything preserved for 2012. Now that the season is over, I was able to put it into alphabetical order and sort it by size, so it is a little easier to read. It will be interesting to see how 2013 will do compared to 2012 now that we have a better grasp of the garden and canning. I also have to remind myself that this was only my second year of canning, too!
In all, we put away 8.5 gallons (freezer bags) in the big freezer and 93 half-pints, 84 pints, and 187 quarts in the pantry. We are still in the process of organizing our pantry, adding additional shelving and just getting it organized overall. Once we finish getting it cleaned up and organized for winter, I will post some pictures to share with everyone.
We are already in the process of looking ahead to 2013 and are considering a few new things. We are researching greenhouses and are actually thinking of replacing our shed with an assemble-yourself greenhouse. This should help with seed starting come February. I also watched a phenomenal video on youtube that taught how to start seeds to ensure proper growth. I am really excited to try out some of their ideas. We are looking at expanding the garden into the flower gardens around the house by planting the culinary herbs, herbal tea plants and medicinal plants close to the house. This year, we are ordering our heirloom seeds from a provider that we recently heard about, www.mypatriotsupply.com. With the new herbs and medicinal plants, I had to order a book so that I could learn how to use them! Finally, I also ordered a book on owning a root cellar. We used to have a root cellar in our basement that someone cemented over. Hopefully this book will give us some ideas on how to either restore or build a new root cellar for more storage options.
Now that summer is over, we are back to working on various projects around the house. Thus far, we have reorganized the laundry room. All year long, the washer and dryer have been driving me crazy by "walking" around! I was also having trouble adjusting to having the washer on the right and the dryer on the left as I lived with it in a reverse formation for the past eight years. We initially tried balancing the appliances using cardboard, but they walked right off that too! It was getting really frustrating and annoying, especially since we have a metal capped sewer pipe of some sorts right in that area - and the washer seemed to be constantly hitting it, making even more noise. We finally solved all the problems by switching the two appliances and getting everything adjusted. I am so happy! (Isn't it amazing how the simplest things can put a smile on our face?). Our last improvement to the laundry areas was the addition of a shelving unit like we are using in the pantry. This gives me a great place to store laundry supplies and other project odds and ends.
We also hung the original pantry door back up. The door was found lying on the floor against the outer pantry wall. Unfortunately, it was buried behind so much clutter that we could barely get to it. As part of our basement clean up project, we got that area all cleaned up and decided to hang the door. We weren't really sure why it was taken off to begin with, but suspected it had something to do with the hinges, since they were missing. To our disgust, we discovered that the door had been removed because the piping to the furnace was hung too low, causing the door to only be opened a few inches. Thankfully, this was an easy fix - we simply had to move a supporting block of wood and hang a few inches higher the pipe supports. Now the door can swing open freely. The door needs some work and we are missing some of the hardware, but it still is a neat thing to see, especially since most of the original doors were removed prior to us owning the house.
I'm sure that we will be working on a lot more projects in the house over the winter months - such as working on the wood floors! Unfortunately, we need to use our heat guns to do that project and, really, who wants to use a heat gun in the middle of summer!
Next time, I'll try to have more pictures. Til then, God bless!
Monday, May 14, 2012
2.5" Maple
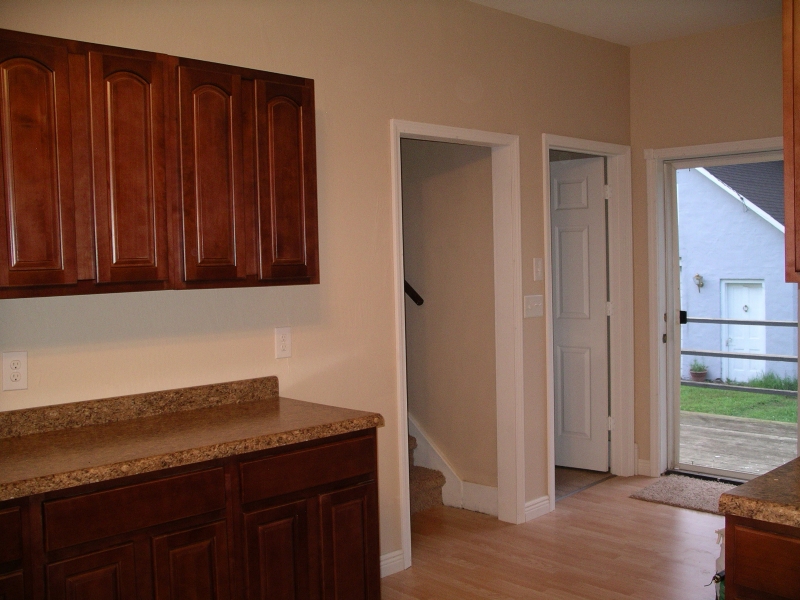
One of the things that we learned during our interview with Mr. Schmidt was that our house had wood floors and only wood floors all throughout - both levels. We had suspected that the second floor had wood floors because we could see them in the closet. And the closet floors are in beautiful condition. We have subsequently removed the vinyl from the back entrance; the laminate flooring from the living room, dining room and kitchen; and the carpeting from the entire upstairs as well as the bedroom located on the first floor. To our amazement, all of the wood flooring consists of 2.5" maple tongue and groove boards. This was surprising because in the 1920s it was common to have maple on the first floor, where everyone could see it, and pine planks on the second. This is good news as it supports our speculation that this house was the "advertisement" or showplace for the mason that built it. The bad news is that the wood floors are in various conditions and require differing degrees of work to restore, as I will detail below:


- Downstairs bedroom: has been sanded with a belt sander prior to someone giving up. Over the beautiful blond board we found paint and drywall compound splatters and a bunch of alphabetical stickers (for our assemble-yourself kitchen cabinets).

- The living room: appears to have had the varnish stripped (or it wore completely off) leaving behind a grayish brown looking wood.
- The dining room: must have had a series of rugs placed on the floor throughout its history as we have several variations of the varnish from almost completely worn off to very dark and aged.

- The kitchen: is a nightmare! There is no other way to describe it. Fortunately, my dear husband and I are able to visualize the potential and we have not been disappointed. When we first removed the laminate flooring, we discovered a floor that was entirely covered with a black, smelly, rubber adhesive. Can you believe that someone actually put down vinyl flooring on a wood floor? It simply boggles our mind.
 |
| Black Rubber Adhesive Covering the Wood |
 |
| Beautiful Flooring After Hours of Work |
- The back entrance: was covered with vinyl when we purchased the home. We had peeled a little bit of it off in an inconspicuous area and discovered new subfloor plywood. This was several months ago and so we simply left it alone. However, while I was gone for the annual UPCI Ladies' Retreat, my husband decided to explore a little more. He found that underneath the vinyl, someone had screwed (with hundreds of drywall screws) a new subfloor on top of the original maple. Unfortunately, we are not able to see how badly damaged the wood may be as it too is covered with the same black gunk as the kitchen.
- The upstairs hallway: was in fairly good condition, although you can see a very defined crack right down the middle where the boards have separated as the house settled. We have been told that the crack could be filled with cork but we are thinking about leaving it as is. Maybe as we refinish the floors, the sealant will help with the cracking.

- The boys bedroom: initially looked like it could just be buffed and polished, it looked so good. And then we discovered where someone must have tripped over a paint bucket. Uhh...mopping and slight scrubbing have done nothing to remove it.

- The girls room: must have been covered with some type of flooring prior to the carpeting. It has some residual adhesive on it, but it is yellow and hard opposed to the rubbery black adhesive downstairs in the kitchen.

- The master bedroom: was also carpeted in its past. We have been told that the thick "film" (for lack of a better description) that is on the floor is the remnant of the rubber backing on the carpet that was glued to the wood floor. We can even read the manufacturer of the carpeting as the name has transposed itself into the adhesive. Sigh....

The process of working on the floors has been mostly one of experimentation. Fortunately, we were blessed with a Porter + Cable palm sander several years ago. I have been using that tool to sand the bedroom floor on the first floor. What a dusty job! It can be quite meditative though, as I tune out the sound of the sander and the vibration in my hand. I have plenty of time to think about things and to pray for everyone on my list!
When we removed the laminate from the kitchen floor and saw the black adhesive, we were not sure what to do, at first. I must confess that we were quite depressed at the sight. After a quick search on Google (don't you just love Google?), we found that the best way to remove the adhesive was by using heat. First, we tried a rag soaked in almost boiling water. It did soften the glue a little so that it could be scraped, but we were only able to remove a very small area. It would take years to do the whole floor using that method!
While sitting there looking at the floor, I remembered that I own an embossing gun...one of those special heat guns that you use when embossing handmade cards. It took a little bit of searching but I finally found it. Wow! Did that really work. We had to point the hot air on the adhesive for about 10 seconds and then it scraped right up. Needless to say, we are not using the embossing gun on the whole floor! My wonderful husband drove quickly to the Fleet Farm located one town over and purchased a Wagner Heat Gun right before they closed. What a wonderful tool it is! With this magnificent gun, we were able to scrape a 10 foot by 8 foot area in about 12 hours (remember the embossing gun? it took an hour to do a 6 inch square!).
Some friends of ours that restored the wood floors in their home have recommended that we use Coke. Our store was out of Coke, so I picked up a 2-liter bottle of Pepsi. We are going to try using it in the Master Bedroom since the heat gun is not working as well on the old carpeting adhesive. Instead of making it easy to scrape off, it turns it to a gluey mess that just sticks to the scraper!
We are also in the process of obtaining some quotes to have the floors professionally finished. We were surprised at how expensive it could be. Our first quote came in at $6,000 to do all the floors! And that is not including staining. I am nervous about doing it ourselves, not to mention that it could take a really long time. We are going to see about getting a revised quote once we have all the floors cleaned up. Hopefully, we will be able to get it done for less. Regardless of the approach we ultimately take, the floors are going to be absolutely beautiful when finished!
Subscribe to:
Posts (Atom)