We just purchased our first home in a small, quaint and charming little town in northern Wisconsin. Let the fun begin! While raising our six blessings, we are going to attempt to revitalize our cozy Dutch Colonial Revival home. Follow along and see what we learn, discover, and overcome in the process. It is sure to be a houseful of laughs!

Showing posts with label Exterior. Show all posts

Monday, May 4, 2015

Catching Up

Wow! I was shocked to see that it has been almost a year since we last posted on the house. We actually did do some things this past year, but not a whole lot house related. I blame it on the pool. This past summer we installed a summer pool and that greatly interfered with any home renovations. We did do some work, but nothing is finished yet. For example:
  • We repaired all the nail holes in the exterior. At least, those that were simply holes and not broken stucco. It only took about four tubes of caulk that can be painted over.
  • We learned how to mix masonry in order to repair a leaking basement window sill and started repairing the larger broken chunks of stucco. Unfortunately, the weather was a bit cold early and we had to stop repairs in late September, early October.
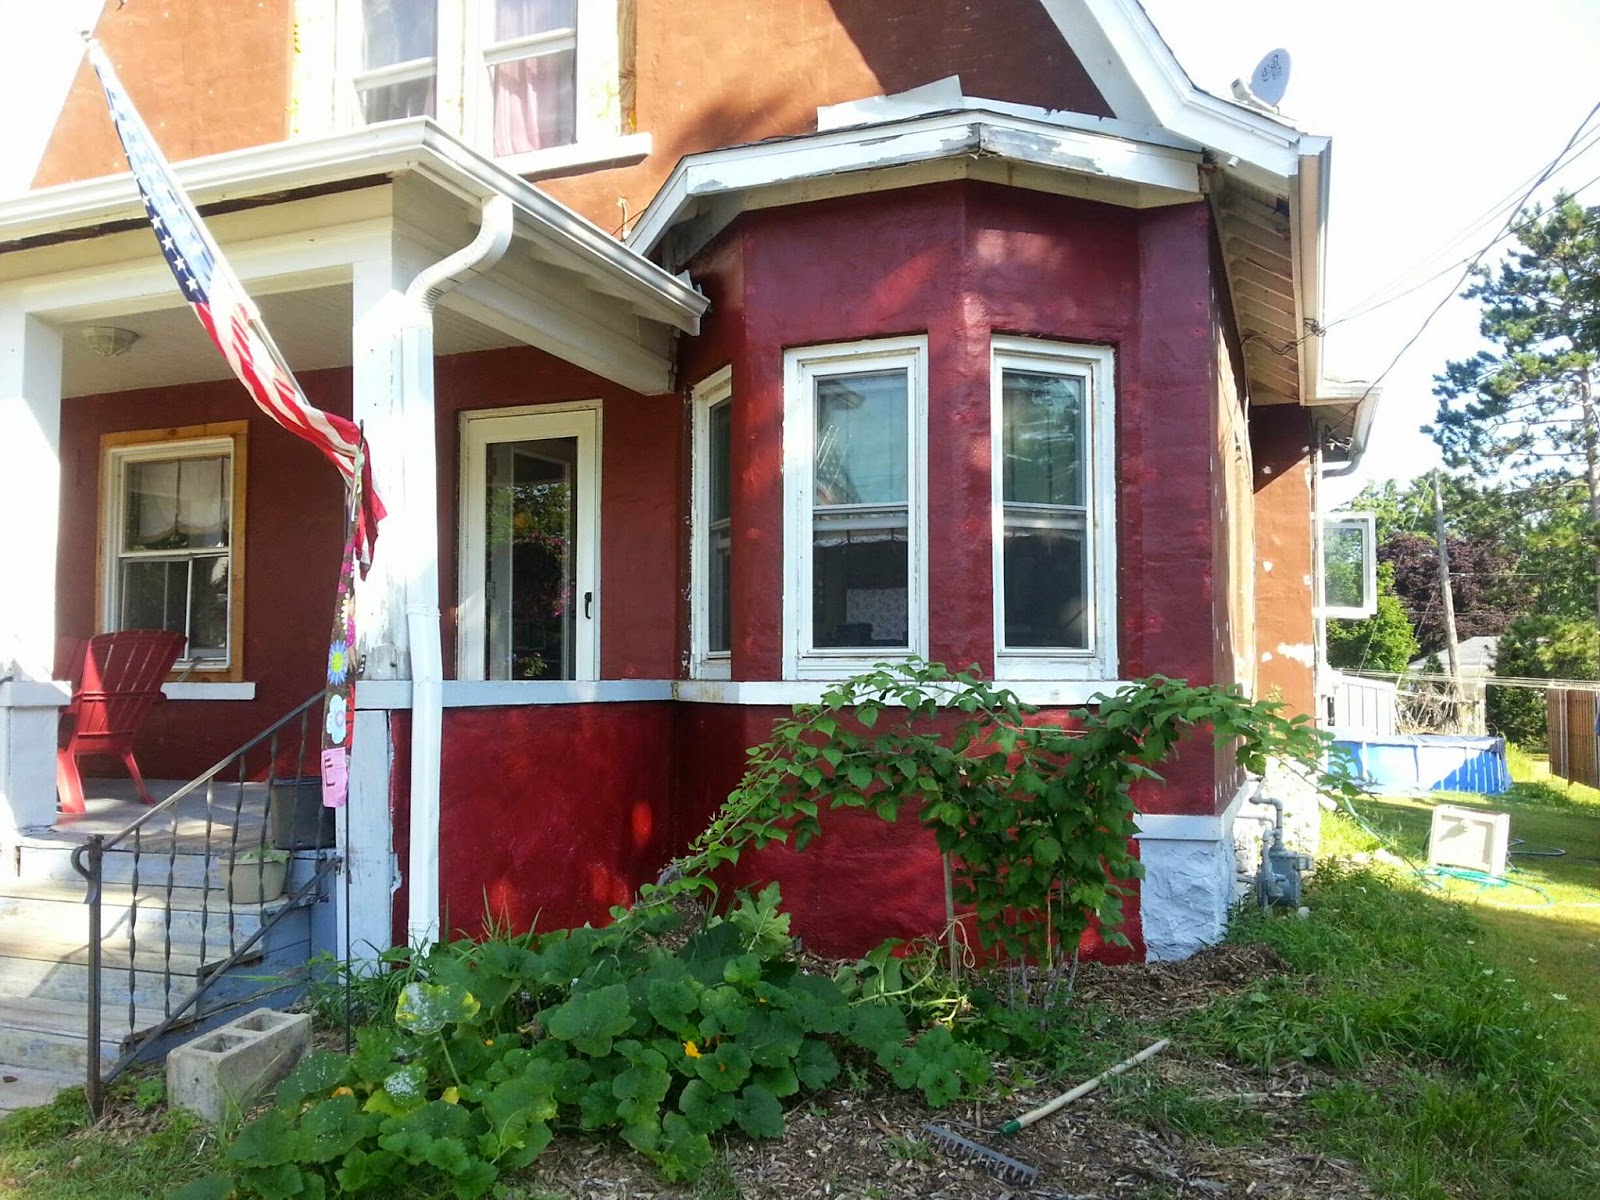
  • We finally selected the exterior house colors. Yeah! This whole process involved a lot of discussion, research, and looking at different color palettes. We narrowed it down to two and actually posted it to Facebook for votes. Yes, it was that challenging to choose! The winning color scheme was the second one (pictured on the bottom).

  • We were able to fully paint - one coat, that is - one exterior wall as well as half of the front of the house. The results were and were not what we expected.

  • We made some interior improvements too, such as adding a new pot rack and more bookcases.
  • We made a new fire pit using rocks we originally tried to use to frame out flower gardens.
At this point, our house looks like it is infected with some sort of small pox. The caulking is appearing lighter and because the base of the house was once painted blue and the original color was a dark brown, the house appears to be two-toned where we painted. We are debating primer or three coats. It's really a tough decision because the paint is expensive. (It comes with a lifetime warranty.....trust me, we only want to paint the house once!)
So, now that you are caught up with what we did, here is what our plan/wishlist is for this summer:
  • Install the perimeter fences: picket fence in the front, privacy fence on the sides, and chain link fence in the garden.
  • Install walking paths with some sort of stone in the garden.
  • Plant two sweet cherry trees in the front yard.
  • Plant a second apple tree in the side yard.
  • Plant grape vines along one side of the privacy fence.
  • Paint the garage to match the new color of the house. (We are not planting a garden this year, so we are improving the infrastructure for the garden and making repairs to the garage - repairs normally impeded by the garden.)
  • Replace garage roof with a steel one.
  • Remove two concrete strips from driveway and replace with either a new concrete drive or a gravel one.
  • Clean out the garage.
  • Transition shed contents to garage.
  • Replace shed with a greenhouse. Or at least, once we replace all the windows from the house, use the old windows to make a greenhouse? See, this is on the "wishlist" side of things.
Basically, we are hoping to really start working on the house again. And posting pictures of our journey. I think we worked so hard the first few years that we just sort of reached a "burnout" point. Now we are itching to get back to work. And of course, we will continue to keep you posted.

Saturday, April 21, 2012

Evicted!

This week we evicted quite a few creatures from our home...bats, bees and birds! A couple of weeks ago, I explored the history of our home and carefully removed the vinyl siding from the porch area of our house.


The picture above shows what the house looked like with the siding. Our house was built by a master craftsman - a true professional of masonry. Evidence of his workmanship is visible in the original fieldstone basement, deep outhouse pit, and lined well. What we did not know when we purchased our home was that his beautiful workmanship was also hidden from our sight, behind cheap vinyl. Imagine our surprise when we discovered that our house is actually entirely constructed of NATCO hollow tile brick overlayed with stucco.


Initially my husband was not too happy with me; however, he quite quickly forgave me and got involved in the history as well. In addition to the stucco, we found beautiful concrete sills under the windows and doors.


In addition to these great finds, we found a bat living under the siding. This critter was the first to be evicted. Unbeknownst to us, he had friends hiding in the wings!


We also had what appeared to be live wires that were melted (at least to my inexperienced eyes); however, after my husband took a look at it, he cleaned it up and we discovered the original placement of the meters and connectors for the electricity and phone.


We have tossed around a few ideas as to what to do with this feature. We are thinking about either purchasing antique meters or 1920's style house numbers. Regardless, we thought that this was kind of interesting. Of course, our curiosity did not stop there, and before you knew it...


Our crew was at it. We first moved into our house mid June of 2011. We were surprised by the large numbers of flies and bees that were constantly flying around the house, not to mention a few bats at night. We now know why! While removing the siding and other cracker-jack-box installations around the house, we discovered over 100 various wasp paper nests - some were still occupied! We also found a few birds nests, like this one. And four more bats!


The siding was installed in a very interesting fashion. First, huge pieces of styrofoam were put up and held in place with wooden strips. These strips were necessary so that the vinyl siding could be nailed into place. Unfortunately, whoever installed the siding used long horseshoe nails like this. We have hundreds of them to remove from the masonry.


As also seen in the picture above, we discovered that almost all of the windows stick out of the house two to three inches. This explains the extraordinarily large window ledges we had inside! Additionally, we found out that most of the windows are not even close to what was originally installed. Many of the windows are quite a bit smaller and in some cases, two windows were used to fill in the opening originally created for one. We also found a hidden door on the second floor. Here is what the house looks like now, without a majority of the siding. We still have some work to do, like actually closing up parts of the wall (now I know why I froze my butt off this winter!). But we love the new look - especially the white framing trim and concrete sills.


Right now the stucco is painted a rather faded and dirty brown. We are planning on painting the old fieldstone (since someone else already painted it) a dark charcoal black, the main part of the house a beautiful barn red and the trim a nice, clean bright white. We will be using some antique blue to accent a few of the smaller details located under the eaves and on the porch. Someday we are also planning on having a blue steel roof installed. I can hardly wait until it is all cleaned up and painted! It is going to look so beautiful and charming.

Wednesday, November 30, 2011

Old(er) Photo

Dave contacted the auditors again today and asked them to send us the picture that they had on file. They were actually willing to do it, which greatly surpised us. We are so thankful to them. While this picture was obviously taken after the siding was put on (we think about 3 owners ago, according to one of our neighbors), we at least now know what the brickwork looked like around the porch. We can only assume the exterior of the house was similar when it was originally constructed.

I wonder if my paint removal process will work on masonry or if we should try pressure washing or sandblasting first. Believe it or not, someone actually painted the beautiful brickwork the same color as the vinyl siding on the house so it completely blends in!

We also happened to recognize the realtor's sign in the front yard. So I gave them a call today and asked them to check out any files that they might have for this address for pictures of the interior, as our search for the original floor plan layout continues. I will be sure to share if they do happen to find any.

In the meantime, work on the stairs has continued. The process has gotten easier, though. The trick was to use a lot more of the stripping gel - you almost have to paint it on so that the stairs look like you painted them orange. It only took me a couple of hours to get four more completed today. We are now at the halfway point to the landing (which I am NOT looking forward to). I can only pray that the landing comes as clean as the stairs and as easily.