We just purchased our first home in a small, quaint and charming little town in northern Wisconsin. Let the fun begin! While raising our six blessings, we are going to attempt to revitalize our cozy Dutch Colonial Revival home. Follow along and see what we learn, discover, and overcome in the process. It is sure to be a houseful of laughs!

Friday, November 2, 2012

Deconstructing the Plywood Walls

Shortly after we bought our house, we noticed that the walls above the pillars located between the living room and dining room were made of plywood. Yes, plywood. Initially, we discovered this because we noticed a crack in the wall and since this is right below the master bedroom, we were worried about the stability of the second floor.


You might remember this picture from one of our previous posts. When we bought the house, these white "pillars" were covered with baseboard.
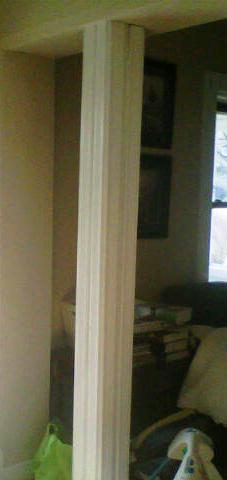

We had removed the baseboard, but left the ceiling alone for the time being. That is, until  today.


The first thing we had to do was to identify where all the screws were that attached the plywood to the wood studs and supporting woodwork. My poor husband really had his work cut out for him on this project!


Once the screws were removed, he attempted to pry out the plywood pieces, uses a hammer and crowbar. Unfortunately, as you can see from the picture below, the hammer just up and quick!


However, we were not deterred and continued the slow and tedious process of removing the plywood. Not only did we have to remove a lot of screws, but we also had to strip out the drywall netting used for the top and side seems.


When the first piece was finally removed, it only made us more anxious to remove the rest.


We continued to work on it for a while, but then stopped for the night.


 We probably could have kept going, but a slight mishap with the ladder resulted in a bruised and swollen ankle. My poor husband did quite a number on himself. But it was back to work bright and early today - but with some extra "help"!


Mommy was starting to get concerned about the safety of the little man, and so it was time to get some protective gear on. Daddy was more than happy to donate his. Thank you Daddy!


With master craftsman DJ giving a helping hand, the job seemed to go so much faster.
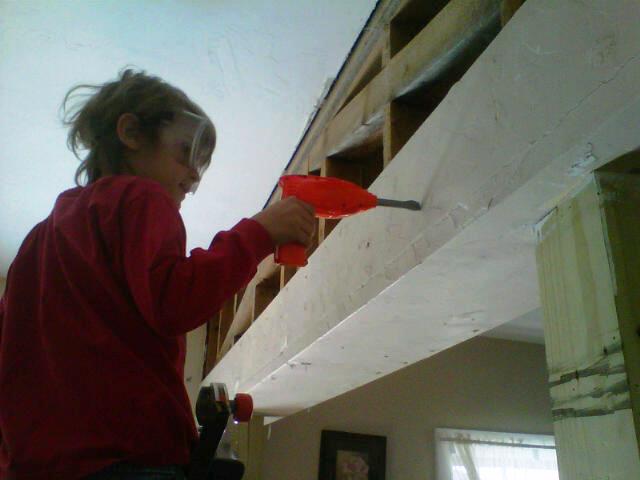
 
Not really, but he was so proud of being such a big "helper" working on the house with his Daddy!


And DJ taught us a few things too. This whole time, I thought those funny loops on blue jeans were called belt holders for a reason - such as holding your belt. But I have been corrected in the error of my thinking. Apparently, those are crucial for holding your necessary tools! Your pockets provide some additional holding capacity too.


It was surprising how many screws were used to install the plywood wall! And of course, they had to use two different types of screws, so my dear husband was always having to switch between a star bit and a phillips bit. It was my job to hand him the drill with the correct bit and collect the screws as he removed them. We managed to collect quite a few of them to use on other projects around the house.


Here is what it looks like now that it has been all deconstructed and cleaned up. I love the look of the beams and the amount of light that transfers from the dining room into the living room. It gives it a feeling of more space too.


One of the things that was really popular in the 1920s was the use of stained glass windows. I am thinking about incorporating them in a few areas of the house, including this space. Now, the picture below is only to give a visual conceptual idea of what it is that I am thinking. Of course, we would get a professional to actually design the glass the glass to specifically fit our space. But at least, this way, you can see what I am envisioning.


Don't you think that it will make this space absolutely stunning! I do. :-)

Tuesday, October 16, 2012

Our Cold Cellar & Missing Dumb Waiter

One of the joys of owning an older home is all the history that can be learned along the way. For example, a cold cellar. Now, I had heard of a "root" cellar, or in the case of our home, a "fruit" cellar. However, I had not heard of a cold cellar. When interviewing Mr. Schmidt, he had inquired if the original cold cellar was still in the house. At the time, we had no clue what he was talking about. However, using the description he provided us, we did a little bit of searching and discovered the spot where the original cold cellar had been located.

Prior to the invention of the ice box and before electricity was installed, some homes featured a separate cold cellar - a box located in the basement that could hold perishable items. Some of these cold cellars incorporated a dumb waiter to make it easier to raise and lower the food. We even learned that some of these dumb waiters carried the food all the way from the cold cellar in the basement up into the kitchen or pantry. Based on a review of our flooring above the cold cellar, the original dumb waiter most likely only raised and lowered the food within the basement itself.


This architectural drawing was found in a construction manual from the 1800's. Based on the plan above, you can see why I think that this is the one that closely resembles what we have discovered while excavating our own cold cellar (as if we did not do enough hole digging and excavating between the outhouse and well!). I am hoping that we can use this plan to reconstruct a simple dumb waiter and start using the cold cellar. I think it will be a neat experiment, especially working with the kids to track the temperature every day. Because I do the bulk of my shopping once a month, I have to freeze a lot of things that are normally refrigerated, such as butter, hard cheese, and cream cheese. If this system truly works like an electric refrigerator and is able to maintain a safe temperature range, I will be able to stock up without having to rely on the freezer.


Because we had to use a sledge hammer to break through the concrete "repair", we do not have the smooth sides all around the top. I am hoping that this is something that Dave will be able to fix. As part of our restoration process, we are hoping to build a lid, since the previous owners put the door to the this area of the basement to the left of the cellar. It definitely makes it a challenge to do laundry or obtain food from the pantry.

Based on my research of dumb waiters, they consisted of a wooden box slightly smaller than the cold cellar, with anywhere from two (2) to four (4) shelves and a pair of screened or mesh doors, similar to what you can see on the old pie safes. This allowed the cool air to circulate around and through the storage box itself, ensuring the food stayed cold. Since our cold cellar is only two (2) feet deep, I am hoping to have three (3) shelves. This makes the shelf spacing comparable to what we currently have in our refrigerator. I am also hoping to use tin for the doors, so that I can punch my own design.

While we were able to fairly easily identify where the original cold cellar was located, we had no idea what we would find. I mean, we did not know how the cellar had been filled prior to being cemented over. I thought that it might have been filled with sand and debris, similar to the outhouse and well. We initially tried drilling a few exploratory holes using a drill with a concrete bit. No matter how far down we drilled, all we saw was concrete dust several inches thick. We began to fear that they had used concrete to fill the entire opening. What a nightmare that would have been! Dave began tapping the entire surface area and discovered a hollow sounding spot. We began to pound away in that area until we broke through the concrete. Fortunately, the concrete itself was not that thick. It turned out that when they took down one wall of the rain cistern to open up that portion of the basement, they used the rocks and concrete debris to fill the space. Once we were able to remove the concrete top layer, it was just a matter of lifting out all the large rocks and jagged concrete pieces.


The really super fine concrete debris we are thinking about using in the driveway, similar to gravel. The larger rocks we would like to use to build a permanent fire pit.

Overall, I think that this was another fun and exciting discovery and restoration project for us. Once we have the dumb waiter rebuilt and finished, I will be sure to update with photos of the finished cold cellar, completely stocked!

Saturday, October 13, 2012

Our Wonderful Fruit Cellar Pantry

When our house was originally built in 1920, the basement had a section built out with masonry to be the home's fruit cellar. Today we use the original fruit cellar as our pantry. It is a wonderful and charming space featuring some of the field stone foundation on two sides and the NATCO hollow tile brick on two sides. Some of the wood shelves appear to be original, but are warping quite badly and will need to be upgraded at some point. In the meantime, we have been adding shelving gradually to expand our usable space. As promised, here are some photos for everyone to see.


When you first open the door to the pantry, you see my baker's rack, full of dried beans, canning and pickling seasonings, soup stock flavorings and commercially canned produce and soups. The upper wooden shelves we believe to be original to the house and hold our dry soup mixes (in the white box) and some more canned foods - mostly tomato products and canned meats.


Panning to the right, we added one of those nine-box storage shelves. Originally it was in the boys' room and held the cardboard organizing boxes. Those boxes did not last long and were destroyed before we even moved into the house. It was shuffled around to various rooms until we finally moved it into the pantry. This cubicle storage unit primarily hold baking supplies, such as brown sugar, cornbread boxes, bread crumbs, syrups, rice, powdered milk and instant potatoes. The top also hold some additional baking supplies as well as goodies for the baby.


This is a picture of the inside corner of the pantry space. We installed one of those metal, five-shelved units that you can pick up for about $20.00 at Wal-mart. For the most part, this shelving unit hold all the vegetables that we canned, dill pickles, spaghetti sauce and tomato soup. We have found that these shelves provide a good amount of storage at a reasonable cost and can be gradually added.
  

 This section of the pantry is where we store our commercially packaged condiments and the three types of flours that I like to stock. We are investigating a better, long-term storage option for the flours, but for now, we are keeping them in their original packaging.


The next section of shelving holds our paper products, juice, sugar, chips and water. The shelving space here is a bit awkward. Eventually, we hope to add more of the shelving units to better utilize the space, but still maintain the uppermost original shelf.


Swinging around and we have two more of those wonderful shelves. These are full of home canned goods. The first one holds mostly fruits, in the form of jams, butters and syrups. The second shelf is a mixture of both fruits and vegetables. This is where the overflow of pickles, spaghetti sauce, tomato soup and more is stored.


Finally, we are back around and to the doorway again. We keep crates at the bottom to hold our onions and potatoes and use the window ledge to hold health and beauty products.

So this is our little pantry. I hope you enjoyed the pictures and that it has given you some ideas for your home.