Tuesday, October 8, 2013
A Very Stressful Summer
This summer has been very stressful and not a whole lot has been blogged about. A few months ago, I had visited our doctor and had some routine tests completed. Unfortunately, one of the tests came back with a high risk factor for cancer. This necessitated further testing and a few in-office procedures, along with weeks of recovery. The limits on my activities and the frequent visits to the doctors meant that we have been basically in "maintenance" mode here at the home. The good news is that there was no cancer, for which we are truly thankful. Hopefully, we will be back to business as usual very soon.
Thursday, July 18, 2013
Yes, We Are Alive And Well
I cannot believe how fast time gets away from me! We have had a really busy spring and summer is bursting out on us already. So, here are some updates.
The Living Room Floor
I am sure that some of you are wondering how the living room floor is holding up from our non-traditional refinishing approach. Surprisingly, it still looks really good. I have cleaned it one time with a solution I mixed consisting of vinegar, olive oil, and water. It refreshed it beautifully. At some point, we do plan on sealing it with something more conventional, but for now, we are continuing as is and hoping to get to the dining room next.
Back to Eden Garden - Year Two
A lot of you like to know how the Back to Eden garden approach works. Well, we are floored by the goodness of God! We actually planted our garden super early (for Wisconsin) this year. We had everything in the ground by the third week of April. Yes, we know it was still cold. But, believe it or not, our garden soil was not frozen! The heavy mulch that we put down last fall really helped. We had more weeds this year initially but I think this was due to two factors: (1) we had a much wetter spring than last year and (2) I was not able to get a truckload of wood chips until the last week of June. We had tried to get some using the same resources from last year, but it was not working out. But then one day, I noticed a company cutting down some of our neighbors' trees. So I asked for the wood chips. At first, they said "no" because they thought I would not want the leaves and everything. I finally convinced them that I knew what I would be getting and so we got a whole truckload! They were really happy to give it to us since it saved them a trip back to their home shop - about an hour away one way!
It is because of the garden that I have not been able to blog like I wanted to. We have already eaten all the radishes and lettuces. We are almost to the end of the sweet peas and are getting buried in zucchini and green beans. Plus with the local strawberries coming in and now the blueberries, I have been super busy canning, processing and baking.
We did do a few things different this year. Over the winter I read a few books on companion gardening and so we tried this approach. Since this is only our second year of gardening, we feel this year has already been a success, and we definitely learned from our mistakes last year. But the learning curve continues.
We learned last year to cage our tomatoes. This year, we learned that tomatoes will grow where you never even planted them - like in the middle of your corn.
This year I planted beets, and learned that beets look a lot like dandelions and other weeds when they first sprout. Yep, you guessed it - I pulled all my beets! And replanted them.
I learned that peas love carrots and parsnips. All three are growing like crazy! I also learned that corn, beans, and vine plants love one another. Unfortunately, picking beans that are growing around corn stalks, covered with vine plants like squash means it is really hard to get the beans! Those vine plants are itchy! But I have had a much better crop of beans this year compared to last year!
Last year and this year I planned out the garden using Excel. Last year it worked great. This year, not so much. The plan was awesome, but because we did not plant in traditional rows for a large portion of the garden due to the interspersing of herbs and flowers, I have no idea of what is growing and where. It was really confusing. I can't tell you how many times my husband asked me what something was and I had to admit I had no clue because I had never planted much less seen half of the stuff before!
Last year we learned that onions take a really long time to get big like the ones in the store. This year I planted from seed so that NEXT year, I will have wonderful onions. Please God? I only planted like six or seven varieties.....and I really want some good onions!
The House
We have not done a whole lot to the house. My wonderful husband made some new window screens so we could open the windows in our bedroom and the ones at the end of the hall. This helped tremendously in cooling down the house in the early days of summer.
Once it got really hot, we rigged up our own central air. We sealed up all the vents in the basement so that a minimal amount of air leaked out of them. We then installed a window air conditioner in the room with the cold air return for the furnace. Turn on the furnace fan and it sucks the cold air from the air return (cold from the air conditioner and it settling to the floor) and redistributes the air conditioned air throughout the house. Once the vents were blowing cold air, we strategically placed fans in front of each vent upstairs to disperse the air into each room. Voila! Central air. It actually made the second floor of our house livable. Or should I say sleepable?
My husband also surprised me with two apple trees, a blueberry bush and a raspberry bush. We agreed that I could have a small orchard in the front and side of our house, to the clothesline. From the clothesline to the shed and vegetable garden, I am not allowed to plant anything. I think my husband is afraid he won't have anyplace to throw a ball with the kids.
I tried something new this year. Every year that we have been here, I have tried to plant strawberries from seeds. Seeds sold in packets. And nothing has ever grown. So, I took a whole bunch of strawberries that I picked myself from the pick-your-own farm and planted them. Yes, I did. I planted a row of fresh, ripe strawberries. I figured that if they would grow and spread plants at the farm then why not at my house. I am not the only person that thinks this makes perfectly logical sense? Right? So, hopefully next year I will have a beautiful batch of strawberries. Or at a minimum, plants. I mulched them really good with wood chips, and I have been watering them almost daily. I figured with about 100 seeds per strawberry, the odds have to be in my favor.
And we fixed the toilet. Apparently, one of the three stooges, oops, I mean one of the three younger children decided to flush Hamm, the hot wheels version of Hamm, the pig from Toy Story, down the toilet. And Hamm, being made of metal and being slightly taller than the average Hot Wheels, went only so far and then got stuck. We could flush, but had to pray and plunge and eventually the water would disappear down the drain. We tried using a special tool to push Hamm through the toilet to the main pipe, but alas, it did not work. My poor husband had to remove the toilet and push Hamm back out the way it originally went in. I have to admit that Hamm really did look like a pig that had rolled in the "mud". It was down right nasty. But I did learn that installing a toilet is much easier than I first imagined.
That's all for now....I hear some zucchini calling my name.
Saturday, April 20, 2013
A Discovery That Saved Us $7,000
One of the earlier discoveries that we had made about our house was that all of the original flooring was 2.5" maple, on both the first and the second floors. We were thrilled, but discouraged at the same time. It appeared to us that all of the floors were in various conditions and that we would need to refinish them all. We even got a couple of quotes to have it done professionally.
There were a few issues with this option, the greatest of course being the price. We were quoted $3,500 per level which meant $7,000 for all the floors in the house. Ouch! Secondly, we would be required to vacate the premises and ensure that all furniture was removed from each level of the house since it would be done in two stages. With a houseful of kids, not to mention the 550 pound upright grand piano, this promised to be a real headache. Especially when one keeps in mind that we are more than 2 hours away from any extended family. Thirdly, we were told that because our floors were maple, once sanded and finished, they would be more blonde in color and not the deep red-brown of the original floors. Bummer....And finally, we would be exposed to all sorts of wonderful noxious chemicals. Great....just great.
We decided to just live with the floors for the time being. It wasn't a tough decision - after all, the kitchen floor at the time was still covered with adhesive and so were two of the upstairs bedrooms. In the meantime, we talked with the local Amish woodworker that has been building our furniture and he said that he would help us try to find out a way to stain the wood the color we wanted. In other words, we could have really good experienced help if we decided to finish the floors ourselves. Still, a daunting task.
But then a little accident saved the project and us $7,000. I had heard about a homemade cleansing paste that could be made by mixing hydrogen peroxide with baking soda. I was in the process of scrubbing out a Coleman cooler with this paste to remove the funky smell it had gotten from being in the garage all winter. In the process, I splattered some of this paste mixture onto the kitchen floor. I finished cleaning up the cooler and set it upstairs in the tub to dry. I then had to clean up the mess on the kitchen floor.
You can imagine my surprise when the paste picture seemed to sand the floor down and remove all the grease, stains and paint. Hmmm. I kept wiping it down with water because the floor seemed a bit gritty. In other words, I could still feel the baking soda. I decided to use some of my homemade orange cleaner, which is mostly vinegar, and wiped it down again. Now the baking soda residue was gone, but the wood looked dry....really dry. That got me thinking. I had heard that back when our house was built, a lot of times oil was used to finish wood. So out came the olive oil. And wow! What a difference. My husband and I literally sat and looked at the small finished section of the floor, to see what would happen, over a period of three days. And nothing happened. I don't know what were expecting, but the floor continued to look awesome.
Those of you that actually read our blog can probably guess what we did next....Yup. We did. We refinished the entire living room floor as our test project. Once again, the results are awesome....especially since we got the color that we wanted! Of course, seeing is believing, so here are some photos for you.

Here is what the floor looked like when we started. Kind of a dingy gray looking wood with a lot of paint spots. I mean, the people that painted in this house never seemed to clean up their paint messes or even protect the wood to begin with. Anyway, I think we can all agree that sure isn't pretty.

I know that in this picture it is kind of hard to see, but in the upper right hand corner, the floor looks a little bit duller than the rest; and a bit whiter. Scrubbing the floor with the paste made from hydrogen peroxide and baking soda really did a great job of cleaning up the wood. The "gray" appearance turned out to be mostly dirt. I don't even want to think about how many years worth I was scrubbing away. It also removed the majority of the paint. You can kind of see where I stopped because you can see all the paint spots!
After scrubbing the floor with a paste, it looked like the floor, of course, but with a white powdery finish with swirly marks. As a scrubber, I used a Scotch Brite Dobie Sponge. It really did the trick and held up pretty much until the end. Of course, the last few boards were a bit challenging because the sponge finally gave up and fell apart. The next step was to wash down the area scrubbed thoroughly. Again and again with really hot water. The goal was to get all of the baking soda and peroxide residue off the floor. And then the fun really begins. You get to sit and watch the floor dry.
Exciting.
I know. It's almost as fun as watching paint dry.

In this picture, the floor is all scrubbed clean and I am waiting for the floor to dry. That is why the clean part looks a little bit shinier than the section below it which I have not started. Once the floor is dry, I thoroughly sprayed it with my homemade orange cleaner. Spray, spray, spray...and then wipe, wipe, wipe. The vinegar in this cleaner does an awesome job of removing any residue from the baking soda and gives you a really clean, kind of dried out floor. Of course, once you are done wiping it down with the orange cleaner, you get to....
You guessed it.
Sit and watch the floor dry. Again.
Once the floor is dry again, then you can start pouring on the oil. We used an extra virgin olive oil packaged in Italy. It costs about $6 per bottle and I used three bottles on our living room floor. Our living room roughly measures 12 feet by 14 feet, just to give you an idea. To spread the oil, I used a swiffer type mop with a washable attachable cloth. I simply poured the oil on the floor and then spread it around.
The number of "coats" of oil that you want to use is up to you. The more you add, the darker it gets. We have put down two heavy coats to achieve the look and color that we wanted.

We are not quite done with the floor in this picture. I still have to move the couch and end table, but it did provide an excellent "before" and "after" comparison. What a difference!
To clean the floor, we will be using a mix of vinegar and olive oil until we can seal the floor. I am still researching the best option on how to do that, but will be sure to share once we decide on something.
Now just to wait for my arms, legs, and back to recover to move onto the next room.
Thursday, April 11, 2013
Waiting....
Up here in the frozen tundra, winter seems unwilling to release her hold on us as we anxiously await warm spring days. It is hard to believe that last year, at this time, we were enjoying warm, balmy days and were hard at work taking down all the trees in the yard. This year, as you can see, no such luck!

This snow is actually fresh...fresh, as in it fell last night and was added to on and off throughout the day today. Which means that we are still working sporadically on interior projects, like scraping the trim in the upstairs hallway. Boy, that's about as exciting as it can get. I am sure you are sorry to have missed post after post about how we have been scraping. And scraping. And scraping. Hours and hours of it. We have killed about four scrapers thus far, with more left to do.
A few years before we bought the house, someone had the brilliant idea of painting all the original trim white. Except that they must not have known about such things as sandpaper or primer because the paint was not sticking too well and could actually be picked at and removed with fingernails. Not that I recommend that method be used!

So this is what we started with. Underneath all of that white paint is beautiful trim, most of which was originally installed in the house when it was built. And here is where we are at today.

This hallway has two windows and four doors. Originally, though, the hallway had five doors and one window, but the window pictured above replaced the original door. We are planning on reinstalling the door. Why, you might ask? Because we hope to someday add a two-story greenhouse onto the back of the house. We have been told that at one time, there was a double glassed-in porch on the house, but that it was torn down when it became unsafe due to neglect.
So, as you can see, not a whole lot is happening that is really exciting to write and read about. Hopefully, this cold spell will go away soon and then we will have more updates. We are planning on painting the house this year! And of course, we are putting in the vegetable garden. We are also planning on adding four more gardens around the house and yard. So, stay tuned for painting and landscaping....eventually!
Friday, March 1, 2013
Kids, Kitties, and More
The new year started off with a real bang. First, our family grew by three kittens. Unfortunately, they were infected with ringworm, which they so lovingly shared with us. Tubes and tubes of medication later, and everyone is finally healthy.
As for work on the house, not a whole lot has been happening. We continue to move forward ever slowly. Some of our seeds are started in hopes of an early spring and I spent the past three weeks organizing my sewing room. This is my room - my sanctuary. But it also has to contain a lot more than just my sewing. Over the holidays, my mother was kind enough to gift me with this wonderful hand quilting frame. Of course, it is very large and measures about ten feet long. In other words, that means that there is literally only one wall that I can place it near.

This gift kind of caused the organizing bug to bite me big time. Then my mother shared a YouTube video with me created by Creative Organizer that shows how to organize and fold your fabrics. This really got me going. My OCD was officially in high gear. I'll try to explain each picture below for those that are interested. If organizing really bores you, feel free to skip this post!

The first step was finding all of my quilting and sewing fabrics. In an effort to clean up the sewing room so that we could sand the original wood floors, I had boxed and boxed everything I had. Most of this was stored in the basement; other boxes wherever I could fit them. The upper cabinet of this closet now provides much needed storage for my quilt batting, bolts of white muslin and backing fabric. The lower closet originally came with the three uppermost shelves and the brackets on the inside of each door.

I hung a lap quilt made from a panel that my mom gave to me on the left-side closet door; the right side holds my hand quilting hoop and the pedals for two of my sewing machines. I saved the clear vinyl plastic bags that some curtains were in and found that these were great for corralling the foot pedals and power cords. As for the fabrics, the top shelf holds all of my flannels. I like to use flannel when backing smaller projects, like simple little wall hangings. The next shelf holds my fabrics that consist of pieces too long to even be able to fold in half! These work great for backing larger projects. The bottom shelf holds a few miscellaneous projects and some completed piecework. I did use a small rubbermaid tub to hold all the panel pieces and their coordinating fabrics. I was surprised by how many of them I had to work with! Finally, on the floor are the extension tables for two of my sewing machines. I use these when machine quilting.

I originally tried to organize all my fabrics in the nine-cube storage shelves (see next picture), but quickly learned that I had way more fabric then space. Thankfully, the baker's rack was available and able to be repurposed now that pantry is done. The bright pink gift bag is holding a special project that I am currently working on with my mom. The two little drawers contain quilting tools and special project items (pins, alligator clips, etc.). I hung little tags so that I would know what was in each drawer! The shelves hold specifically colored fabrics that were too numerous for a cube. The little picnic basket on the floor by the closet door holds all of my fabric that features food. It just cracked me up and made me so happy every time I came across a fabric with some type of food on it!

Moving on around the room, we see the nine-cube storage shelves. This holds my smaller quantity fabrics or are organized by those fabrics that did not really fit into one color category. I have a boys' novelty pile; a girls' novelty pile; a gender neutral pile; a rainbow pile; a patriot pile, and so on. I am also able to use the top to store an extra sewing machine as well as various bits of binding, buttons, and lace in the mason jars. Finally, the little magazine rack holds my finished quilt tops waiting to be mounted on the quilt frame.

The hand quilting frame is tall enough that I am able to store the repurposed bins underneath without them interfering with my hand quilting. One bin holds my papers for card making and scrapbooking; another holds my stamps and stamping tools and accessories; all my cross-stitch fabrics are stored in yet another bin; and so are my scraps from various quilting and sewing projects. There is one bin that is a bit odd - the homeschool curriculum bin. Since this is my room and we use a lot of the stamping and scrapbooking supplies for making various school projects, it just made sense to keep it all together and protected in "my space". Finally, behind the bins is a huge rolling tackle box that I use to store all my embroidery floss (in numerical order and numbered). On the wall behind the frame are a bunch of randomly hung nails specifically for hanging templates and rulers.

Here is my primary working area. My favorite sewing machine is the one directly in front on the little sewing table. In the drawer of the sewing table I keep important manuals for the sewing machines and the exchangeable quilt hanging frame decorative tops. The dresser to the right has three drawers; the top one holds my sewing tools and the bottom two drawers hold pieces of fabric that are too small for the other fabric piles but too big for the scrap bin. On top I have placed my cutting board and in more mason jars I have placed various crafting tools: general scissors, specialty scissors, paintbrushes and markers, and chalk. As you can see from the labeler, it is kept handy just for labeling everything in sight! Finally, the treadle sewing machine is stored in its cabinet and the primary secondary sewing machine sits on top so that I can quickly and easily switch between the two machines.

Sometimes I just need an extra set of hands or lap. I love this little rolling cart. I usually store it between the dresser and the closet when I don't need it. I use this to store my threads in the top drawer and projects in progress in the bottom two drawers. When I am working on a hand quilting project, the top is a great place to set my spool of thread, pin cushion, scissors, thimbles, grips and more. (In the first picture up top that shows the quilting frame you can see all the stuff I throw on top of this when quilting!)
 This is the matching closet to the first one that I showed at the top of this post. The upper cabinet here holds fabric for clothes, opposed to ones that I would use for quilting. The shelf holds a few scrapbook albums and some totes with cross-stitch patterns, lace trimmings, rick rack, and notions. I also have a small, portable tackle box with general, commonly used embroidery floss for projects "on the go". Finally, I used a divided lunch container to hold my glue gun and sticks. My ironing board folds up and fits in the blank space that you see above. If it should happen to fall, the closet rod catches it, preventing it from falling completely. My husband also added another shelf to the bottom of this closet, perfect for holding a box of sewing notions (elastic and zippers) as well as some mason jars with additional sewing trimmings and my two irons.

Between the two closets is a charming little window seat with three "sections". On the left side is a little cupboard that is perfect for holding my various three-ring binders that I use to organize various things. In the middle is a large storage area, with a lid that lifts up. Inside here I have stored our games. I am hoping that this will prevent us from losing any more pieces! On the right side is a small file drawer. This is the perfect place to store my patterns and specialty stitch cards for my sewing machine. I tried to dress this area up a bit to make it warm and comfortable.
 I saw this wonderful idea on Pinterest - using tea cups for tie backs. I was struggling with hanging mine, but then my husband suggested industrial strength velcro. And it worked beautifully! Next to the folded fabric, this gives me a tickle of pleasure.

Finally, I begged my husband to build me a bookshelf for above the window seat that would be strong enough to hold my various quilting, sewing and decorating books. Understanding my concern about how heavy these could be, he repurposed two bi-fold doors. Using the window trim and two additional brackets in addition to quite a few screws, safely secured this for me! Of course, the little baskets up there are holding some more quilting projects too!
I know that these individual photos can make it challenging to get a true feel for the room, so my last picture for today is a more full picture photo from the door. I really love my space and find myself going in there for a little bit every chance I get. Now, just to get the rest of the house in order! Maybe then I won't feel so lost in all the remodeling!

As for work on the house, not a whole lot has been happening. We continue to move forward ever slowly. Some of our seeds are started in hopes of an early spring and I spent the past three weeks organizing my sewing room. This is my room - my sanctuary. But it also has to contain a lot more than just my sewing. Over the holidays, my mother was kind enough to gift me with this wonderful hand quilting frame. Of course, it is very large and measures about ten feet long. In other words, that means that there is literally only one wall that I can place it near.

This gift kind of caused the organizing bug to bite me big time. Then my mother shared a YouTube video with me created by Creative Organizer that shows how to organize and fold your fabrics. This really got me going. My OCD was officially in high gear. I'll try to explain each picture below for those that are interested. If organizing really bores you, feel free to skip this post!


I hung a lap quilt made from a panel that my mom gave to me on the left-side closet door; the right side holds my hand quilting hoop and the pedals for two of my sewing machines. I saved the clear vinyl plastic bags that some curtains were in and found that these were great for corralling the foot pedals and power cords. As for the fabrics, the top shelf holds all of my flannels. I like to use flannel when backing smaller projects, like simple little wall hangings. The next shelf holds my fabrics that consist of pieces too long to even be able to fold in half! These work great for backing larger projects. The bottom shelf holds a few miscellaneous projects and some completed piecework. I did use a small rubbermaid tub to hold all the panel pieces and their coordinating fabrics. I was surprised by how many of them I had to work with! Finally, on the floor are the extension tables for two of my sewing machines. I use these when machine quilting.

I originally tried to organize all my fabrics in the nine-cube storage shelves (see next picture), but quickly learned that I had way more fabric then space. Thankfully, the baker's rack was available and able to be repurposed now that pantry is done. The bright pink gift bag is holding a special project that I am currently working on with my mom. The two little drawers contain quilting tools and special project items (pins, alligator clips, etc.). I hung little tags so that I would know what was in each drawer! The shelves hold specifically colored fabrics that were too numerous for a cube. The little picnic basket on the floor by the closet door holds all of my fabric that features food. It just cracked me up and made me so happy every time I came across a fabric with some type of food on it!

Moving on around the room, we see the nine-cube storage shelves. This holds my smaller quantity fabrics or are organized by those fabrics that did not really fit into one color category. I have a boys' novelty pile; a girls' novelty pile; a gender neutral pile; a rainbow pile; a patriot pile, and so on. I am also able to use the top to store an extra sewing machine as well as various bits of binding, buttons, and lace in the mason jars. Finally, the little magazine rack holds my finished quilt tops waiting to be mounted on the quilt frame.

The hand quilting frame is tall enough that I am able to store the repurposed bins underneath without them interfering with my hand quilting. One bin holds my papers for card making and scrapbooking; another holds my stamps and stamping tools and accessories; all my cross-stitch fabrics are stored in yet another bin; and so are my scraps from various quilting and sewing projects. There is one bin that is a bit odd - the homeschool curriculum bin. Since this is my room and we use a lot of the stamping and scrapbooking supplies for making various school projects, it just made sense to keep it all together and protected in "my space". Finally, behind the bins is a huge rolling tackle box that I use to store all my embroidery floss (in numerical order and numbered). On the wall behind the frame are a bunch of randomly hung nails specifically for hanging templates and rulers.
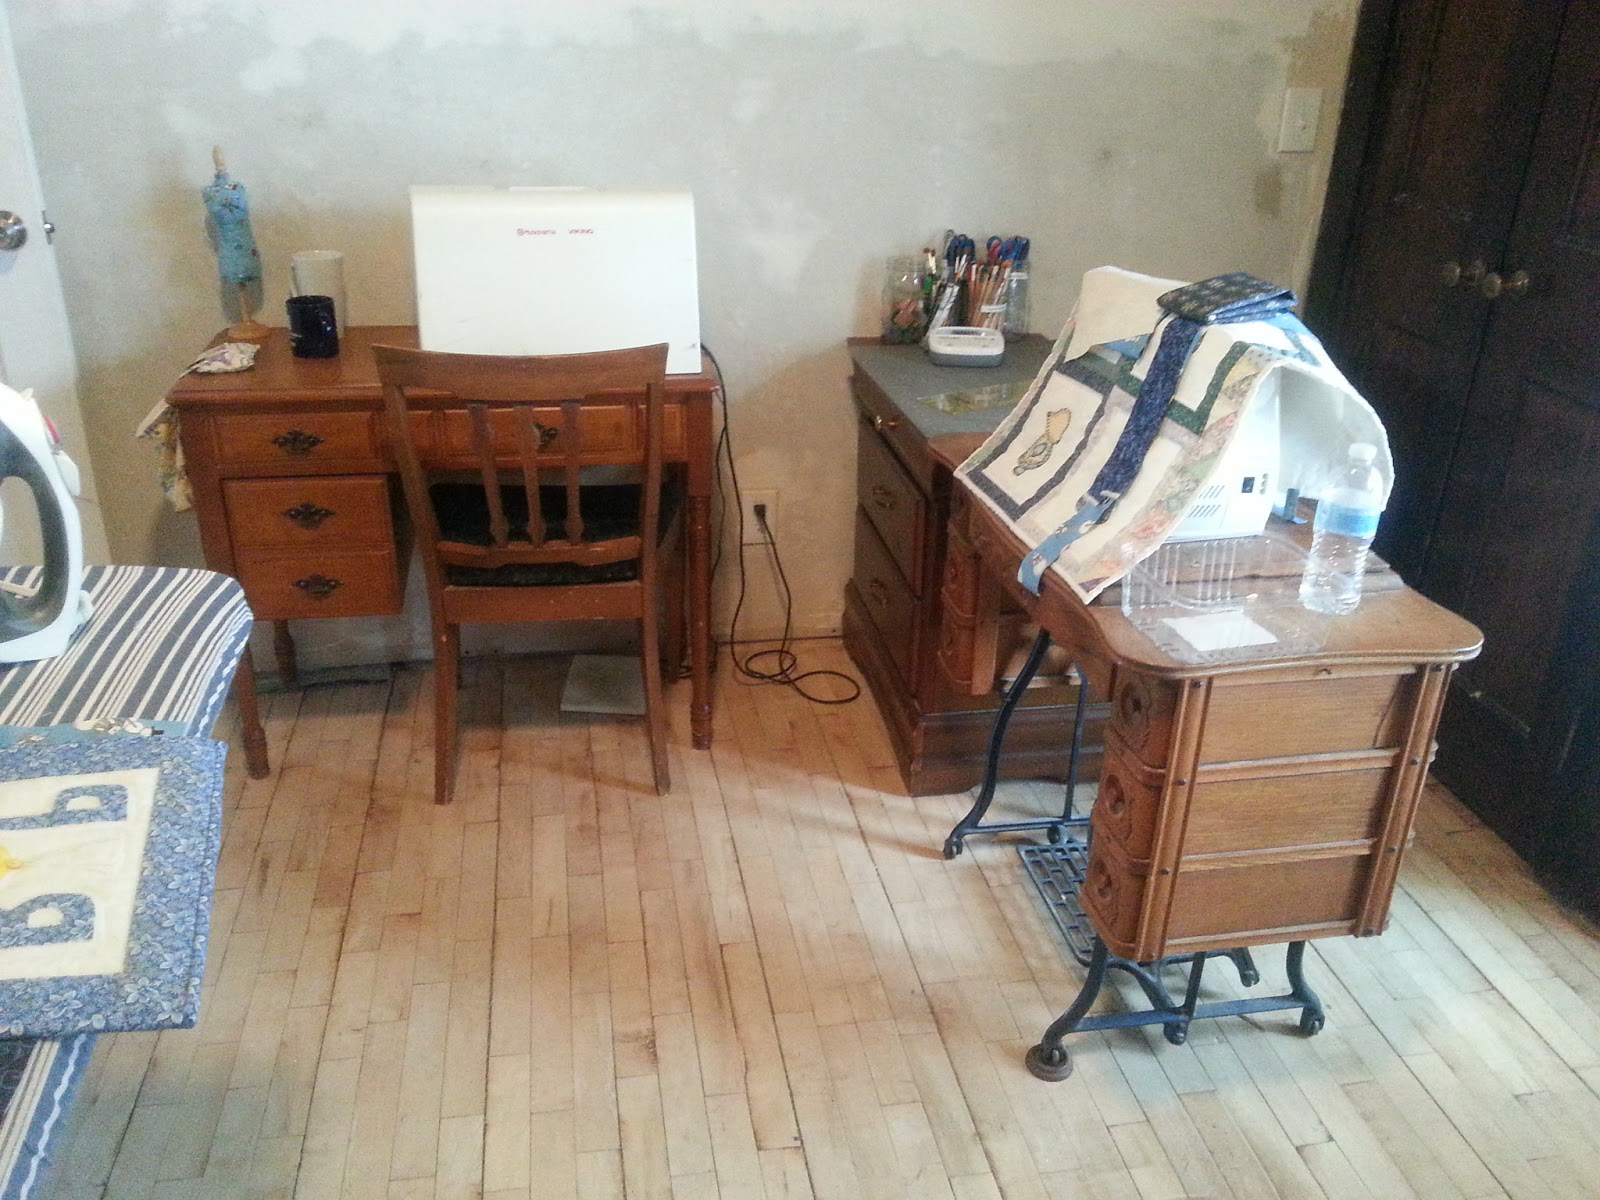

Sometimes I just need an extra set of hands or lap. I love this little rolling cart. I usually store it between the dresser and the closet when I don't need it. I use this to store my threads in the top drawer and projects in progress in the bottom two drawers. When I am working on a hand quilting project, the top is a great place to set my spool of thread, pin cushion, scissors, thimbles, grips and more. (In the first picture up top that shows the quilting frame you can see all the stuff I throw on top of this when quilting!)


Between the two closets is a charming little window seat with three "sections". On the left side is a little cupboard that is perfect for holding my various three-ring binders that I use to organize various things. In the middle is a large storage area, with a lid that lifts up. Inside here I have stored our games. I am hoping that this will prevent us from losing any more pieces! On the right side is a small file drawer. This is the perfect place to store my patterns and specialty stitch cards for my sewing machine. I tried to dress this area up a bit to make it warm and comfortable.


Finally, I begged my husband to build me a bookshelf for above the window seat that would be strong enough to hold my various quilting, sewing and decorating books. Understanding my concern about how heavy these could be, he repurposed two bi-fold doors. Using the window trim and two additional brackets in addition to quite a few screws, safely secured this for me! Of course, the little baskets up there are holding some more quilting projects too!
I know that these individual photos can make it challenging to get a true feel for the room, so my last picture for today is a more full picture photo from the door. I really love my space and find myself going in there for a little bit every chance I get. Now, just to get the rest of the house in order! Maybe then I won't feel so lost in all the remodeling!

Subscribe to:
Posts (Atom)