As for work on the house, not a whole lot has been happening. We continue to move forward ever slowly. Some of our seeds are started in hopes of an early spring and I spent the past three weeks organizing my sewing room. This is my room - my sanctuary. But it also has to contain a lot more than just my sewing. Over the holidays, my mother was kind enough to gift me with this wonderful hand quilting frame. Of course, it is very large and measures about ten feet long. In other words, that means that there is literally only one wall that I can place it near.

This gift kind of caused the organizing bug to bite me big time. Then my mother shared a YouTube video with me created by Creative Organizer that shows how to organize and fold your fabrics. This really got me going. My OCD was officially in high gear. I'll try to explain each picture below for those that are interested. If organizing really bores you, feel free to skip this post!


I hung a lap quilt made from a panel that my mom gave to me on the left-side closet door; the right side holds my hand quilting hoop and the pedals for two of my sewing machines. I saved the clear vinyl plastic bags that some curtains were in and found that these were great for corralling the foot pedals and power cords. As for the fabrics, the top shelf holds all of my flannels. I like to use flannel when backing smaller projects, like simple little wall hangings. The next shelf holds my fabrics that consist of pieces too long to even be able to fold in half! These work great for backing larger projects. The bottom shelf holds a few miscellaneous projects and some completed piecework. I did use a small rubbermaid tub to hold all the panel pieces and their coordinating fabrics. I was surprised by how many of them I had to work with! Finally, on the floor are the extension tables for two of my sewing machines. I use these when machine quilting.

I originally tried to organize all my fabrics in the nine-cube storage shelves (see next picture), but quickly learned that I had way more fabric then space. Thankfully, the baker's rack was available and able to be repurposed now that pantry is done. The bright pink gift bag is holding a special project that I am currently working on with my mom. The two little drawers contain quilting tools and special project items (pins, alligator clips, etc.). I hung little tags so that I would know what was in each drawer! The shelves hold specifically colored fabrics that were too numerous for a cube. The little picnic basket on the floor by the closet door holds all of my fabric that features food. It just cracked me up and made me so happy every time I came across a fabric with some type of food on it!

Moving on around the room, we see the nine-cube storage shelves. This holds my smaller quantity fabrics or are organized by those fabrics that did not really fit into one color category. I have a boys' novelty pile; a girls' novelty pile; a gender neutral pile; a rainbow pile; a patriot pile, and so on. I am also able to use the top to store an extra sewing machine as well as various bits of binding, buttons, and lace in the mason jars. Finally, the little magazine rack holds my finished quilt tops waiting to be mounted on the quilt frame.

The hand quilting frame is tall enough that I am able to store the repurposed bins underneath without them interfering with my hand quilting. One bin holds my papers for card making and scrapbooking; another holds my stamps and stamping tools and accessories; all my cross-stitch fabrics are stored in yet another bin; and so are my scraps from various quilting and sewing projects. There is one bin that is a bit odd - the homeschool curriculum bin. Since this is my room and we use a lot of the stamping and scrapbooking supplies for making various school projects, it just made sense to keep it all together and protected in "my space". Finally, behind the bins is a huge rolling tackle box that I use to store all my embroidery floss (in numerical order and numbered). On the wall behind the frame are a bunch of randomly hung nails specifically for hanging templates and rulers.
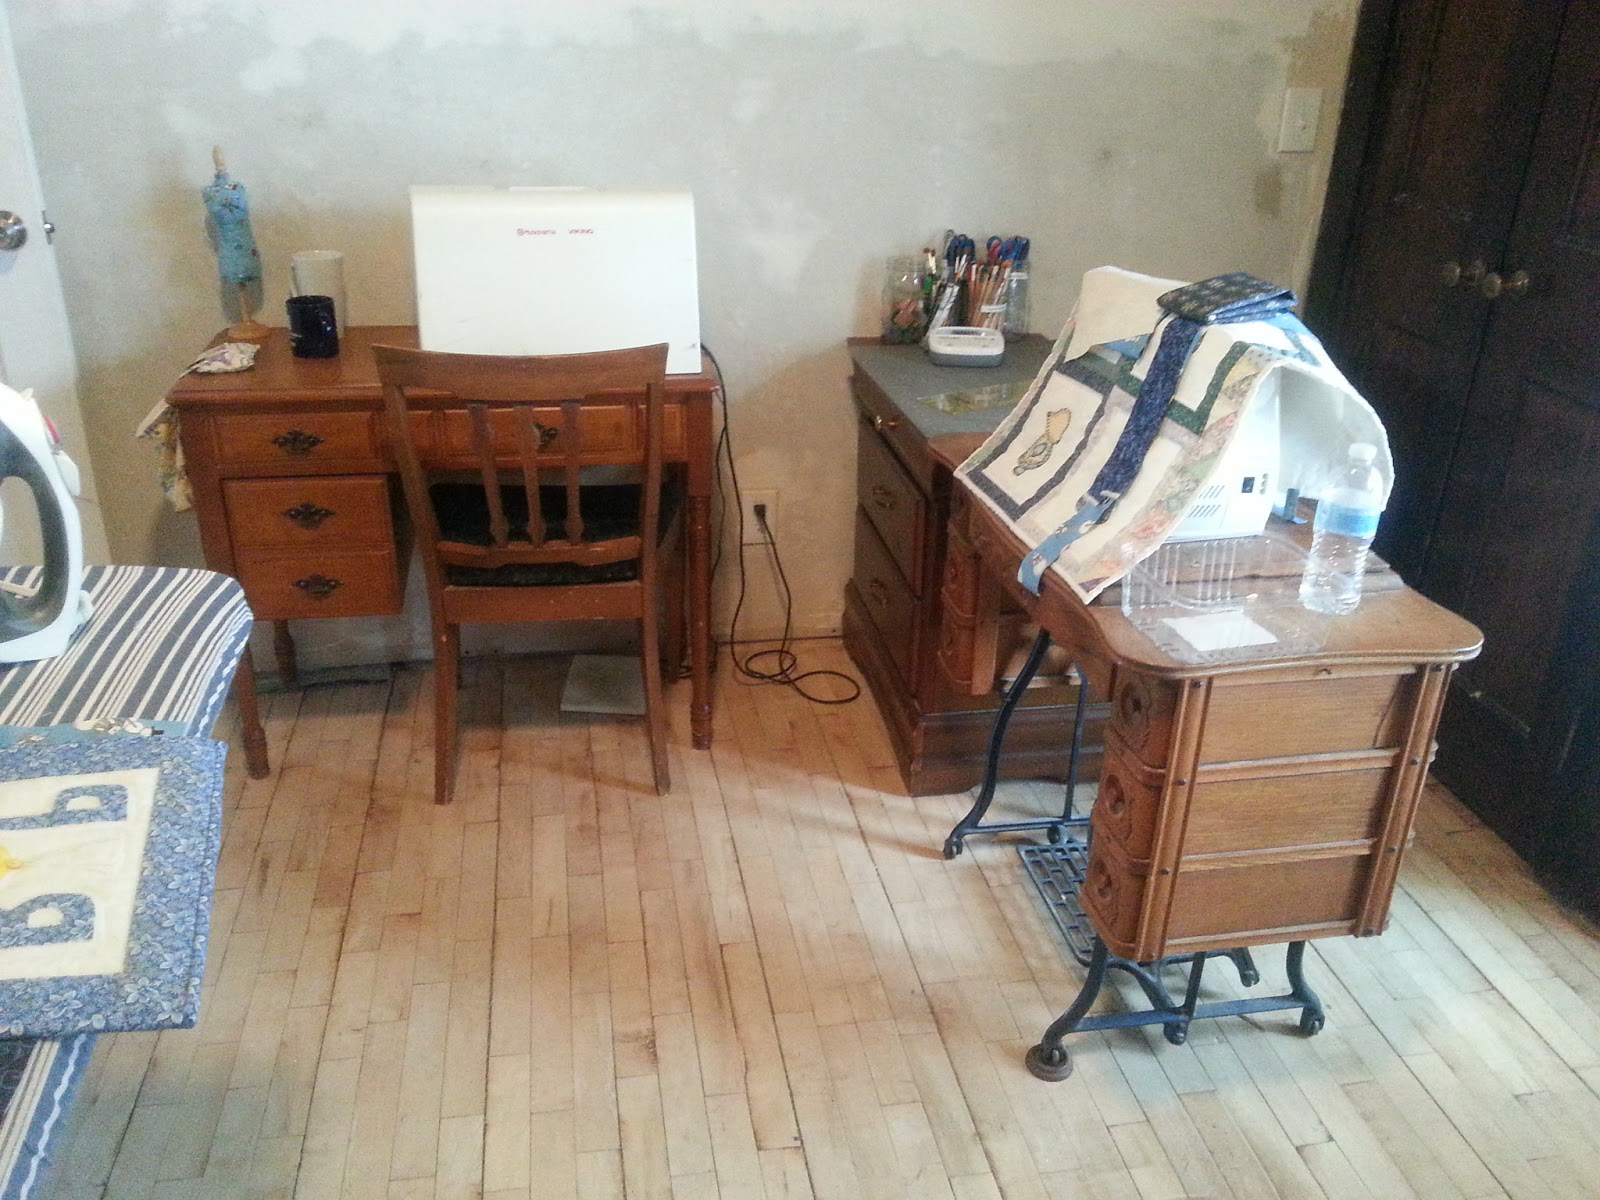

Sometimes I just need an extra set of hands or lap. I love this little rolling cart. I usually store it between the dresser and the closet when I don't need it. I use this to store my threads in the top drawer and projects in progress in the bottom two drawers. When I am working on a hand quilting project, the top is a great place to set my spool of thread, pin cushion, scissors, thimbles, grips and more. (In the first picture up top that shows the quilting frame you can see all the stuff I throw on top of this when quilting!)


Between the two closets is a charming little window seat with three "sections". On the left side is a little cupboard that is perfect for holding my various three-ring binders that I use to organize various things. In the middle is a large storage area, with a lid that lifts up. Inside here I have stored our games. I am hoping that this will prevent us from losing any more pieces! On the right side is a small file drawer. This is the perfect place to store my patterns and specialty stitch cards for my sewing machine. I tried to dress this area up a bit to make it warm and comfortable.


Finally, I begged my husband to build me a bookshelf for above the window seat that would be strong enough to hold my various quilting, sewing and decorating books. Understanding my concern about how heavy these could be, he repurposed two bi-fold doors. Using the window trim and two additional brackets in addition to quite a few screws, safely secured this for me! Of course, the little baskets up there are holding some more quilting projects too!
I know that these individual photos can make it challenging to get a true feel for the room, so my last picture for today is a more full picture photo from the door. I really love my space and find myself going in there for a little bit every chance I get. Now, just to get the rest of the house in order! Maybe then I won't feel so lost in all the remodeling!
